
One of the main things that our home needed the most was an update for the kitchen. We had the honey oak cabinets, old hardware, honey oak floor, and a huge ugly lighting box that dropped the ceiling a good 6 inches (at least). It also needs some new counter-tops but... that is a project for another time. The flooring has been changed (that will be the next post!)
So I decided to take on painting and antiquing the cabinets. Although it was a TON of work... I think it was worth it. I love how they turned out and it really brightened up our space.
Our cabinets were in really good condition, they were just... not my favorite color! Especially since the floors were the same color- see the before picture in all it's glory below: Can you see the awesome light fixture??


Then I took all of the hardware and cabinet doors off.


I lightly sanded everything- this is the part I got my hubby to help because I h.a.t.e. sanding. It actually really didn't take too long. We sanded about 30-60 sec. per cabinet door.
While sanding was getting finished up, I put plastic down and taped all around the cabinets- the ceiling, the floors, and any walls that were touching the cabinets. I ran out of good tape so I used this cream tape... Not a good idea! Just buy the good stuff! It's worth it :)
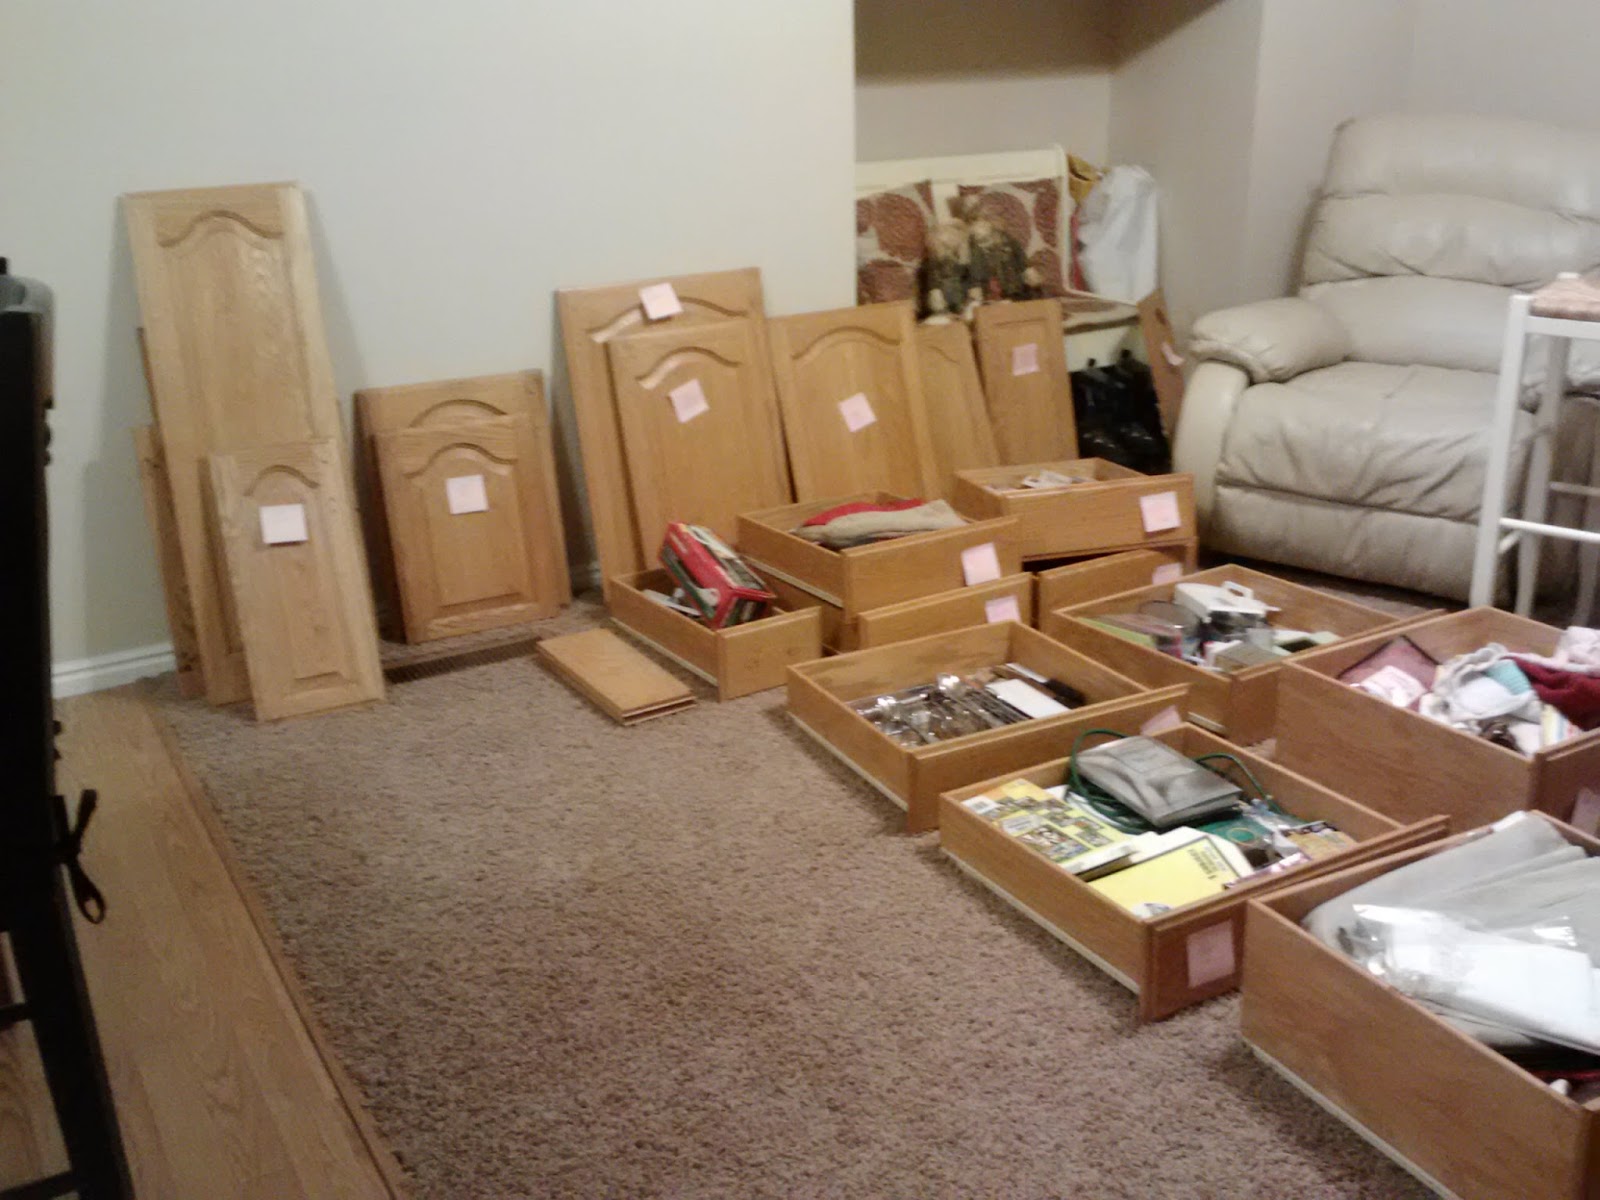
Can you see all of the sticky notes on each drawer and cabinet door? This is telling me where each one goes so it would all fit right and be easy when I went to put it back together (Which, at this point, was hours and days away). If you ever do this, I highly recommend labeling the doors and drawers. It helped for sure.
After the sanding was done, the painting began! I got paint with primer in it to save some work- I ended up putting 3 coats of antique white Behr paint on. In hindsight, I probably only really needed to do two but sometimes I can be a perfectionist and this was one of those times. Here's what it looked like when it was painted. I was really tempted to leave it white because it just looked so clean!


.jpg)
It's pretty easy to do- I just brushed it on with a foam brush (.30 cents at the hardware store) and then I went right behind with old t-shirts and wiped it all off. I had to be really careful that I wiped it all off the same so there's not streaks or parts that are way darker than other. Once you wipe it away you are left with a cool oldish look. To see what I mean- take a look:

 |
| With and without the glaze |


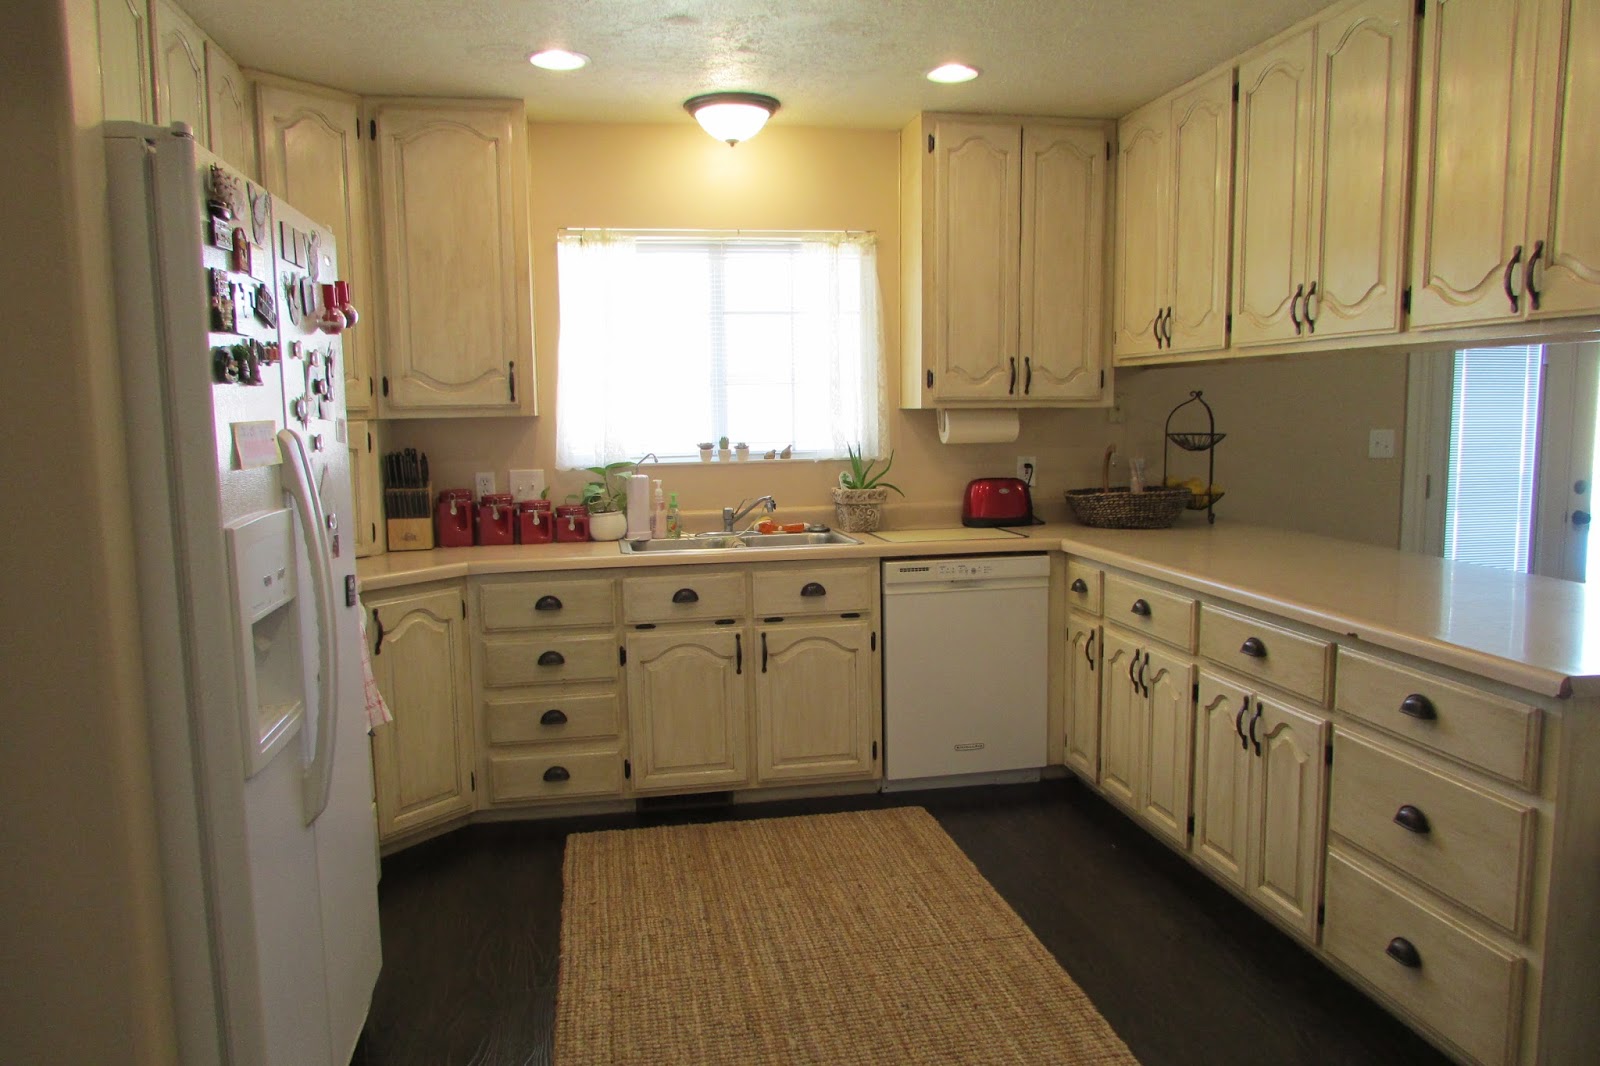
The antiquing part gave me a work out for sure, but it gave it character and I love how it turned out. After I antiqued it, I put a top clear coat to protect everything, added some new oil-rubbed bronze hardware, and it was done!!!! We worked on it on the weekends and nights after work and it ended up taking about 2 weeks.
Here's the finished product!!


Now fast forward to last April--we re-did our flooring and here's the kitchen now!

Love how your blog is turning out!!!!!!!!!! LOVE YOU!!!!!!!!!!
ReplyDelete